How to Add Outlets to a Detached Garage
Adding outlets to a detached garage transforms it from a basic storage space into a fully functional workspace. Late spring is the ideal time to tackle this project before summer projects begin. A detached garage needs its own dedicated electrical supply, which makes outlet installation more involved than indoor work. The process requires careful planning, proper permits, and code-compliant wiring methods. Most homeowners benefit from professional installation because the work involves trenching, underground conduit, and subpanel coordination. Done correctly, your detached garage gains the power needed for tools, lighting, and seasonal projects. This guide walks through the full process so you understand what goes into the job.
The Planning Phase for Adding Outlets to a Detached Garage
Proper planning prevents costly mistakes during a detached garage outlet installation. You need to calculate the total electrical load required for your intended use. A garage used for power tools, lighting, and a refrigerator has different needs than one used only for storage. The National Electrical Code requires a dedicated feeder circuit from the main house panel to a detached garage subpanel. Permits must be pulled before any work begins, and your local inspector will verify code compliance at multiple stages. Taking time during planning saves money and ensures the system meets your needs for years.
Calculating Power Needs Before Adding Outlets to a Detached Garage
Start by listing every tool, appliance, and fixture you plan to use in the garage. Power tools like table saws and air compressors draw significant amperage during startup. Lighting fixtures, ceiling fans, and small appliances also contribute to the total load. Add the wattage of each item, then divide by the voltage to determine the amperage requirement. Most detached garages benefit from a 60-amp or 100-amp subpanel, depending on usage. A licensed electrician can perform a proper load calculation that accounts for diversity factors and future expansion. This calculation determines the size of the feeder wire and breaker needed at the main panel.
Next, consider how many outlets the garage actually requires. Code requires receptacles spaced along walls so no point is more than a certain distance from an outlet. Workbench areas benefit from outlets every four feet at counter height for tool flexibility. Ceiling outlets work well for garage door openers and overhead lighting. Outdoor-rated outlets on the exterior provide power for landscaping equipment and seasonal items. Mapping out outlet locations on paper helps you visualize the finished layout. Good planning here means fewer extension cords and a safer workspace.
Finally, think about specialty circuits your garage might need. An electric vehicle charger requires its own dedicated 240-volt circuit and a properly sized breaker. Welders and large air compressors also need dedicated 240-volt circuits to operate safely. Heated floors, mini-split systems, and shop heaters all have specific electrical requirements. Identifying these needs during planning ensures the subpanel has enough capacity for everything. Adding circuits later is possible but costs more than including them in the initial installation. Need help calculating your detached garage power needs? Click here for our garage wiring service.

Permits and Code Requirements for Adding Outlets to a Detached Garage
Every detached garage electrical project requires permits from your local building department. Permits exist to protect homeowners by ensuring the work meets safety standards. An inspector reviews the plans before work begins and inspects the installation at key stages. Working without permits creates problems when selling the home and can void homeowner insurance claims. The permit fee is small compared to the protection it provides. Most municipalities require the homeowner or a licensed electrician to pull the permit.
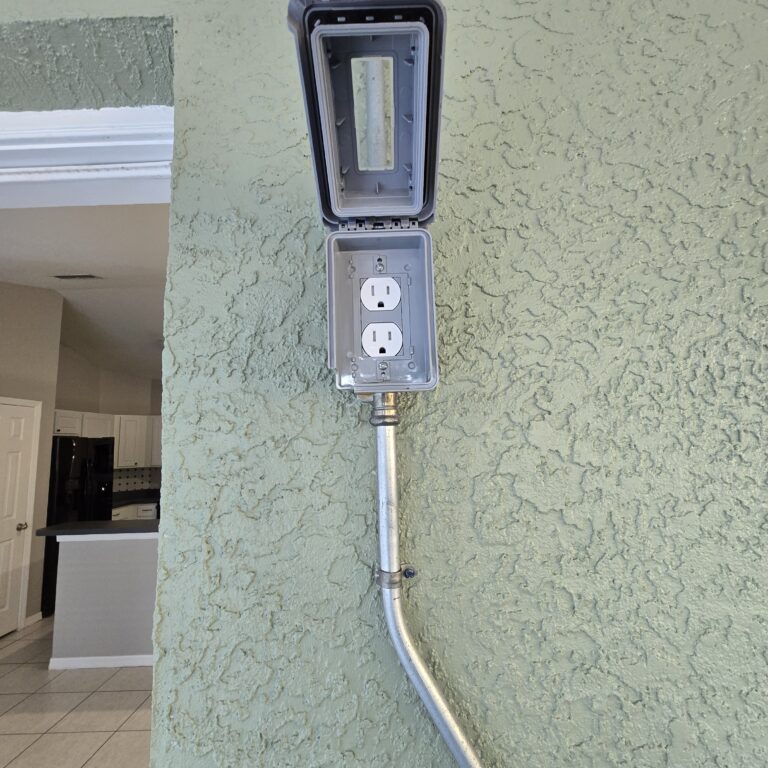
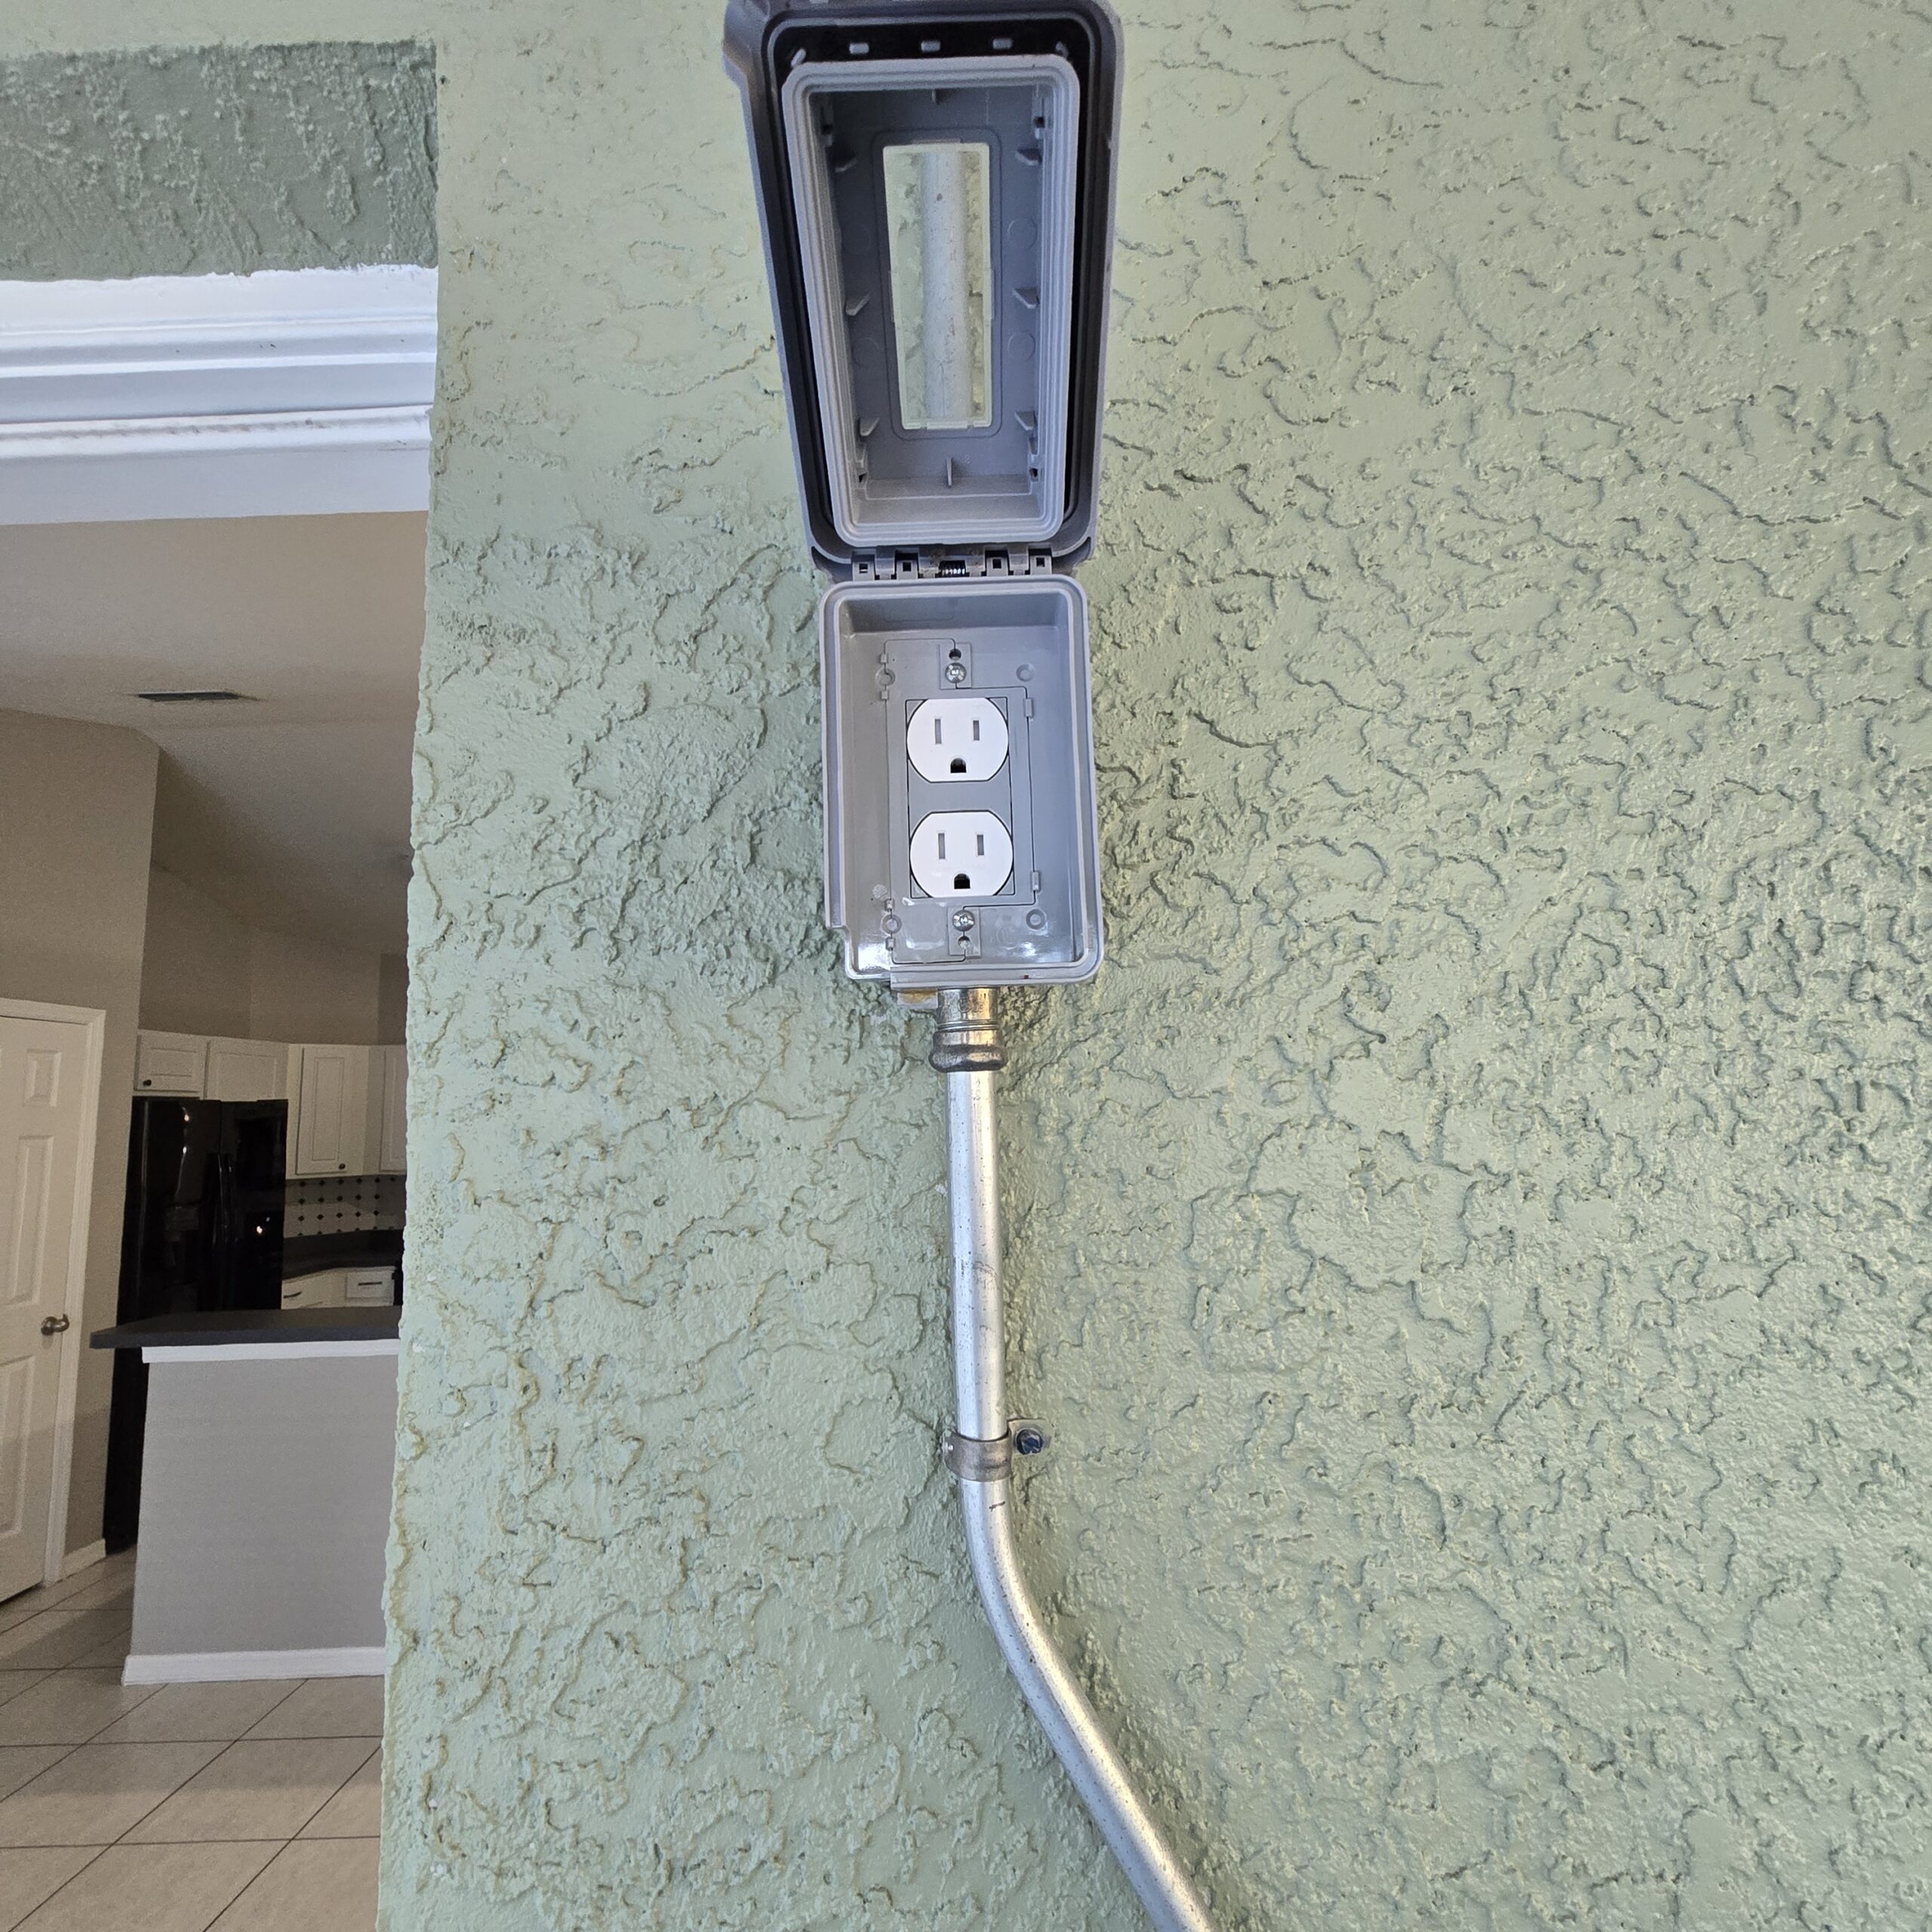
The National Electrical Code has specific requirements for detached structures. A detached garage must have its own grounding electrode system, typically two ground rods driven into the earth. The feeder from the house must include a separate equipment grounding conductor along with the hot and neutral wires. GFCI protection is required for all garage receptacles to prevent shock hazards. AFCI protection may also be required depending on your local code adoption. These requirements exist because garages present unique electrical hazards from moisture and metal tools.
Local amendments to the National Electrical Code vary by jurisdiction. Some areas require conduit for all underground wiring, while others allow direct-burial cable at specific depths. Stark County and surrounding Ohio communities have their own requirements that may differ from neighboring areas. Working with a licensed local electrician ensures the installation meets every applicable code. Inspectors look for proper wire sizing, correct breaker selection, and adequate grounding during their visits. Failing an inspection means stopping work until corrections are made, which delays the project significantly.
Choosing the Right Wiring Method for Adding Outlets to a Detached Garage
Underground feeder cable, known as UF cable, is one common method for running power to a detached garage. UF cable can be buried directly in the ground at a minimum depth of 24 inches. The cable contains insulated conductors within a solid plastic jacket designed to resist moisture and physical damage. This method works well for shorter runs and smaller amperage requirements. UF cable installation requires careful trenching to maintain proper depth throughout the run. Rocky soil or tree roots can complicate direct burial installations.
Conduit-based installation offers more protection and flexibility for detached garage wiring. PVC conduit can be buried at 18 inches deep, which is shallower than direct-burial cable. Individual THWN wires run inside the conduit, allowing for easier replacement or upgrades later. Conduit also makes it simpler to add circuits in the future without additional trenching. The initial cost is higher than direct-burial methods, but the long-term flexibility often justifies the investment. Schedule 40 PVC is the standard choice for underground electrical conduit in most residential applications.
Inside the garage, wiring runs through the walls using standard NM cable or in conduit along exposed surfaces. Unfinished garage walls often have exposed framing, which makes future modifications easier. Conduit on exposed walls protects the wiring from impact damage from tools and equipment. Metal boxes provide better protection than plastic boxes in workshop environments. Every outlet should be installed in a box that is securely fastened to the framing. Want to upgrade your existing electrical panel before adding garage circuits? Click here for our electrical panel upgrade service.
The Installation Process for Adding Outlets to a Detached Garage
The actual installation of detached garage outlets follows a logical sequence from the main panel to the final receptacle. Each step builds on the previous one, and shortcuts at any stage create problems later. A licensed electrician follows specific procedures to ensure safety and code compliance. The work involves both indoor and outdoor components, with weather playing a role in trenching activities. Understanding the process helps homeowners know what to expect during the project. Most installations take between two and four days, depending on complexity and weather conditions.
Trenching and Running the Feeder Cable for Adding Outlets to a Detached Garage
The trench between the house and detached garage must be dug to the proper depth for your chosen wiring method. Hand digging works for short runs, but most installations benefit from a trenching machine. Call 811 before any digging begins to mark underground utilities like gas, water, and existing electrical lines. The trench should have straight sides and a flat bottom to support the cable or conduit evenly. Sharp rocks at the bottom can damage cable insulation over time, so adding a layer of sand helps protect the wiring. The trench path should avoid trees with significant root systems when possible.
Running conduit or cable through the trench requires careful technique to prevent damage. Conduit sections connect with PVC cement at every joint to create a watertight seal. Sweeping bends at the entry points into the house and garage allow wires to pull through smoothly. Pull strings inside the conduit make wire installation easier once everything is buried. Direct-burial cable should be laid flat without kinks or twists that could damage the conductors. Warning tape buried six inches above the conduit or cable alerts future diggers to the presence of electrical wiring.
Connecting the feeder to the main house panel requires shutting off power to the entire home. A new double-pole breaker sized for the garage subpanel installs in available spaces in the main panel. The feeder cable connects to the breaker, neutral bar, and ground bar according to specific wiring rules. Proper torque on each connection prevents loose wires that could cause overheating or fires. The work must be done with the panel cover off, which is why licensed electricians handle this stage. Final inspection of the panel work happens before the trench is backfilled.

Installing the Subpanel for Adding Outlets to a Detached Garage
The subpanel inside the detached garage serves as the distribution point for all garage circuits. Mounting height for the subpanel must allow for the required working clearance in front of the panel. The panel attaches to a sturdy backing, typically plywood mounted to the wall studs. Code requires a clear 30-inch wide and 36-inch deep working space in front of the panel. The subpanel should be located near where the feeder cable enters the garage to minimize wire length. Proper labeling of each breaker helps with future troubleshooting and circuit identification.
Wiring the subpanel correctly is critical for safe operation. Unlike the main panel, the neutral and ground bars must be separate in a subpanel located in a detached structure. The feeder cable connects with the hot wires going to the main lugs and the neutral going to the isolated neutral bar. The equipment grounding conductor connects to the ground bar, which bonds to the panel enclosure. Two ground rods driven outside near the garage connect to the ground bar with a continuous grounding electrode conductor. This separation prevents dangerous voltage differences between neutral and ground.
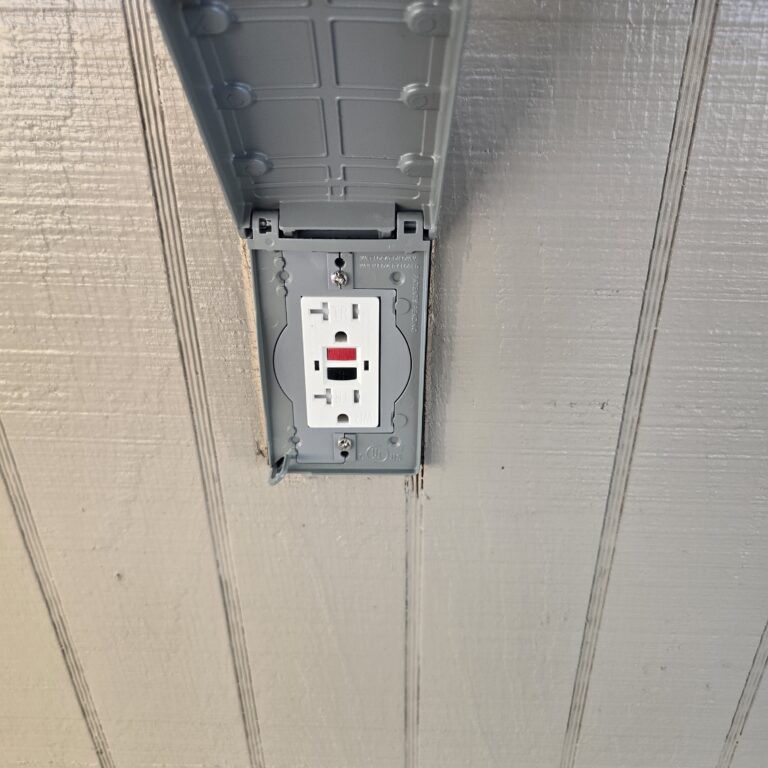
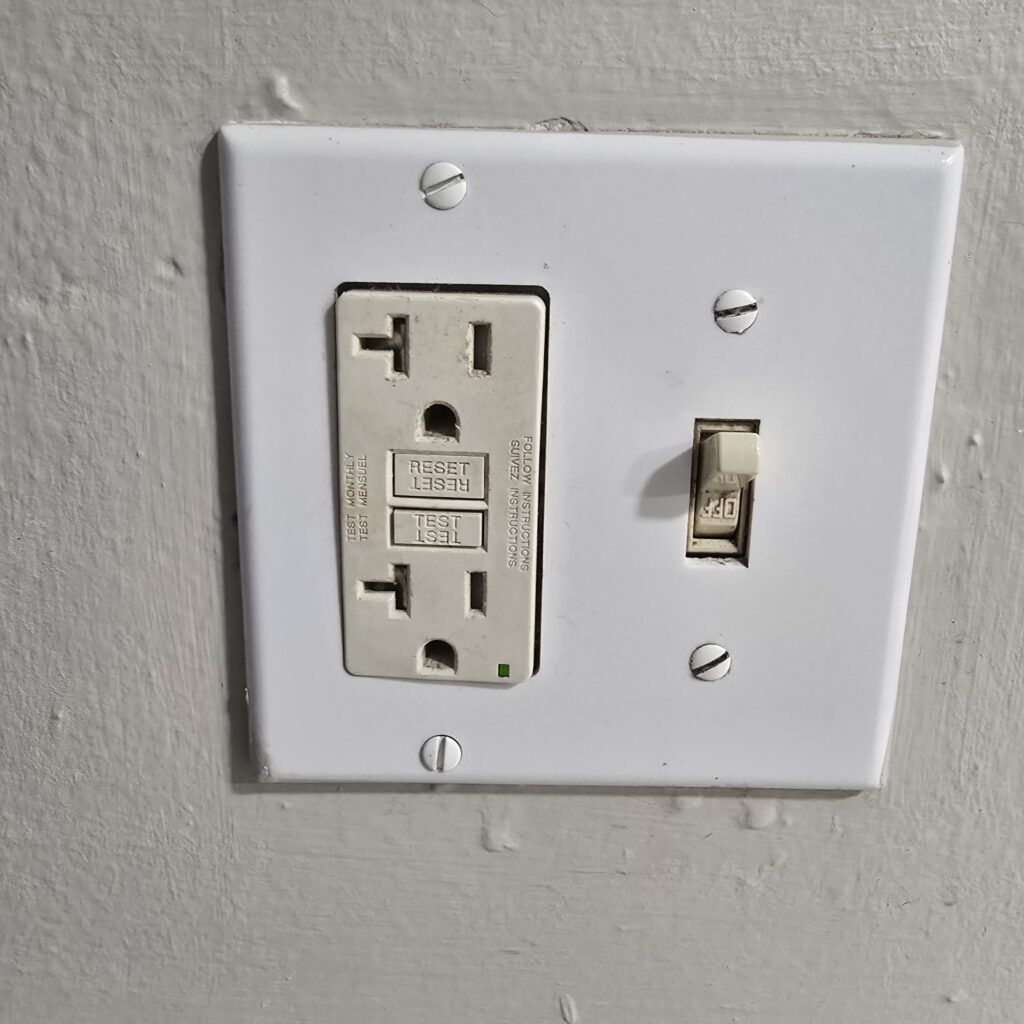
Installing individual breakers in the subpanel completes the distribution system. Each circuit needs a properly sized breaker based on the wire gauge and load requirements. GFCI breakers provide protection for outlet circuits required by code in garages. AFCI breakers protect against arc faults that could cause fires. Combination AFCI/GFCI breakers handle both protection types in a single device. Spare breaker positions allow for future circuit additions without panel replacement. Looking for a complete subpanel installation or repair? Click here for our electrical subpanel repair service.
Wiring the Outlets and Finishing the Installation for Adding Outlets to a Detached Garage
Running individual circuits from the subpanel to outlet locations follows the planned layout. NM cable works well for circuits inside finished walls, while conduit suits exposed installations. Each cable run should be stapled within 12 inches of the box and every 4.5 feet along its path. Holes drilled through framing members must maintain proper distance from the edge to prevent nail damage. Cables crossing the top of joists need protective running boards or conduit to prevent damage. Neat, organized wiring makes future modifications and troubleshooting much easier.
Outlet boxes mount to the framing at the proper height for their intended use. Standard wall outlets typically install at 18 inches to the center of the box. Workbench outlets often install at 42 inches to clear the bench surface. Ceiling outlets for garage door openers mount near the opener location. Boxes must be properly secured and have the correct depth for the number of wires entering them. Cable clamps or built-in clamps secure the wiring as it enters each box.
Making the final connections at each outlet requires attention to detail. The hot wire connects to the brass terminal, the neutral to the silver terminal, and the ground to the green terminal. Backstab connections are less reliable than wrapping wires around the screw terminals. GFCI outlets installed at the first outlet in each circuit protect all downstream outlets when wired correctly. After all connections are complete, testing each outlet with a circuit tester verifies proper wiring before final inspection. Cover plates finish the installation and protect the connections from dust and damage.
Why You Need a Professional Electrician for Adding Outlets to a Detached Garage
Detached garage electrical work involves complexity that goes beyond typical DIY projects. The combination of permits, code requirements, panel work, and underground installation creates multiple opportunities for serious mistakes. A licensed electrician brings the training, tools, and experience needed to complete the job safely. Professional installation also protects your investment by ensuring the work meets insurance and resale requirements. The cost of professional work is reasonable compared to the risks of incorrect installation.
The Safety Benefits of Hiring a Professional for Adding Outlets to a Detached Garage
Electrical work in detached structures presents serious hazards that require professional handling. Working in the main panel exposes the electrician to live bus bars even when the main breaker is off. A trained electrician knows how to work safely around energized equipment using proper procedures and tools. Mistakes in panel work can cause electrocution, arc flash injuries, or fires that destroy the home. Licensed electricians carry insurance that protects homeowners if something goes wrong during the installation.
Proper grounding and bonding protect the entire electrical system from damage. Lightning strikes, voltage surges, and ground faults all rely on a properly installed grounding system to safely dissipate energy. A detached garage requires its own grounding electrode system that connects correctly to the subpanel. Mistakes in grounding can leave metal equipment energized during a fault, creating shock hazards. Professional installation includes testing the grounding system to verify it functions as designed.
GFCI and AFCI protection require correct installation to function properly. These safety devices prevent the most common causes of electrical fires and shock injuries. Improper wiring can defeat the protection these devices provide, leaving the garage unprotected. A licensed electrician knows the specific requirements for each device type and tests them after installation. The peace of mind from properly installed safety devices is worth the professional installation cost.
The Code Compliance Benefits of Hiring a Professional for Adding Outlets to a Detached Garage
The National Electrical Code contains hundreds of pages of requirements that apply to detached garage installations. Keeping up with code changes requires ongoing education that licensed electricians receive throughout their careers. Local amendments add another layer of requirements that vary by jurisdiction. A professional electrician knows which rules apply to your specific project and follows them throughout the installation. Code compliance is not optional, and inspectors fail work that does not meet requirements.
Permit and inspection processes go smoothly when a licensed electrician handles the work. Inspectors recognize professional installations by the quality of workmanship and adherence to code. Pulling permits as a homeowner is possible but requires you to demonstrate knowledge of all applicable codes. Failed inspections delay the project and may require expensive corrections to completed work. Professional installation typically passes inspection on the first attempt because the electrician knows what inspectors look for.
Documentation of the installation matters for future home sales and insurance claims. Permit records show that the work was inspected and approved by local authorities. Insurance companies may deny claims for fires or damage caused by unpermitted electrical work. Real estate transactions often require disclosure of any electrical work, with permits providing proof of proper installation. A licensed electrician provides documentation that protects homeowners for years after the work is complete.
Why Choose Gragg Electrical Services for Adding Outlets to a Detached Garage
Gragg Electrical Services brings over 20 years of proven local experience to every detached garage installation. Our team understands the specific requirements of Stark County and surrounding Ohio communities. We handle every step of the process from initial planning through final inspection. Our lifetime craftsmanship guarantee means you can trust the quality of our work for years to come. We treat every property with respect, keeping job sites clean and minimizing disruption.
Our crews arrive on time in clearly marked vehicles with the tools and materials needed to complete the job. We pull all required permits and coordinate inspections so homeowners do not have to navigate the process alone. Financing through GreenSky and Turns makes larger projects affordable by spreading the cost over time. Our 24/7 emergency service means we are available when unexpected problems arise during or after the installation. Clear communication throughout the project keeps homeowners informed at every stage.
Gragg Electrical Services proudly serves East Canton, Canton, North Canton, Massillon, Louisville, and the surrounding communities. Our reputation for honest pricing and quality work has built lasting relationships with homeowners throughout the region. Call us at (330) 488-8009 to schedule a consultation for your detached garage outlet project. We provide detailed estimates that explain exactly what the work includes and what it costs. Choosing Gragg Electrical Services means choosing a team that stands behind every installation with pride.