How to Wire a Finished Basement the Right Way
Finishing a basement is one of the most cost effective ways to add living space to a home in Stark County, and fall is when most homeowners start the project so the room is ready before the holidays. The framing, drywall, and flooring get all the attention, but the electrical system is what determines how the space actually functions once the work is done. A basement carries conditions that upstairs rooms do not, including concrete walls, higher humidity, lower ceilings, and mechanical equipment that was never meant to be boxed in. Those conditions change how circuits get planned, how cable gets routed, and which protective devices the code requires. Wiring a basement correctly means thinking about the finished room first and working backward to the panel, rather than pulling cable wherever it happens to fit. It also means pulling a permit and scheduling inspections, because everything you install disappears behind drywall and becomes very expensive to correct later. This guide covers the planning, the code requirements, and the practical details that separate a basement that passes inspection from one that gets torn open twice.
Planning the Electrical Layout Before You Wire a Finished Basement
Good basement wiring starts on paper, weeks before anyone drills a stud. You need to know how much capacity your existing service has, how many circuits the finished space will demand, and where the panel sits in relation to the new rooms. Homeowners frequently discover halfway through a project that the panel has no room left, or that the service is already loaded near its limit by an electric water heater and a heat pump. Finding that out after the framing is closed in turns a simple upgrade into a demolition job. The layout also determines how many home runs you need to route back to the panel and where those cables can travel without conflicting with plumbing or ductwork. Take the time to draw the finished floor plan with furniture placement included, because that plan is what tells you where receptacles, switches, and lighting actually belong.
Load Calculations Before You Wire a Finished Basement
Every basement project begins with a straightforward question about capacity, and the only reliable way to answer it is a standard load calculation following Article 220 of the National Electrical Code. That calculation starts with the general lighting and receptacle load, figured at 3 volt amperes per square foot of finished living area, then adds the fixed appliances, heating and cooling equipment, and any large dedicated loads already present in the home. An older 100 amp service that already feeds an electric range, an electric dryer, a water heater, and central air conditioning may have very little headroom left for a full basement buildout. A 200 amp service usually has room, though that is an assumption worth verifying rather than trusting. The calculation also accounts for demand factors, so the number that matters is the calculated load and not the simple sum of every breaker in the panel. A licensed electrician runs this calculation as a matter of routine and can tell you in one visit exactly where your service stands. Skipping this step is how homeowners end up with a beautiful family room and a main breaker that trips every time the space heater and the dryer run together.
There is an important difference between running out of panel capacity and running out of panel space, and the two problems have different solutions. A panel that is physically full of breakers may still have plenty of amperage available, in which case a subpanel installed near the finished area solves the problem cleanly and shortens every cable run in the project. A subpanel needs a properly sized feeder with four conductors, meaning two hot legs, a neutral, and a separate equipment grounding conductor. The neutral bar in that subpanel must be isolated from the enclosure, with grounds landing on their own bonded bar, because bonding neutral and ground at a downstream panel creates parallel current paths on metal that should never carry current. Working clearance rules also apply, so the panel needs 30 inches of width, 36 inches of depth in front, and a clear height of six and a half feet. The panel cannot be installed in a bathroom or inside a clothes closet, and it cannot be buried behind a finished wall. Plan the panel location before framing goes up, since relocating it afterward means reworking every home run in the room.
Think past the current project when you size the feeder and choose the panel, because basements keep collecting loads over time. A homeowner who finishes a basement this year may add an EV charger in the garage next year, a hot tub on the patio the year after, and a workshop with a table saw and dust collection eventually. Sizing a subpanel and its feeder with real headroom costs a modest amount now and saves a complete redo later. The same logic applies to the main service itself, since upgrading from 100 amps to 200 amps during a project that already has walls open is far less disruptive than doing it as a standalone job. Utility coordination, meter work, and grounding electrode upgrades all get handled at once. Ready to find out if your service can handle a finished basement? Click here for our electrical panel upgrade service.
Circuit Planning for a Wired Finished Basement
Once capacity is settled, the next step is deciding how many circuits the finished space needs and what goes on each one. General purpose receptacle circuits in a basement living area are typically 20 amp circuits run with 12 gauge copper, which gives you more usable capacity than a 15 amp circuit and handles the plug in loads that basements attract. A reasonable working approach is one general purpose circuit for roughly every 500 square feet of finished area, adjusted upward in rooms that will hold electronics, gaming equipment, or portable heating. Lighting should live on its own circuit rather than sharing with receptacles, so a tripped breaker from an overloaded power strip does not leave the stairs dark. Splitting lighting across two circuits in a large basement is even better, because a single fault then never darkens the entire lower level. Circuit planning is also where you decide how many receptacles land on each breaker, and the practical limit is driven by expected use rather than a fixed count.
Dedicated circuits deserve their own section of the plan, because several basement fixtures are required by code to have them and several more benefit from them. A basement bathroom needs a dedicated 20 amp circuit for its receptacles, and that circuit cannot serve anything outside the bathroom unless it serves only that one bathroom entirely. A wet bar or kitchenette needs small appliance branch circuits sized the same way a kitchen would be. A sump pump belongs on its own circuit so it never competes with anything else, and the same applies to a chest freezer that could quietly thaw behind a tripped shared breaker. Furnaces and air handlers require a dedicated circuit with a service disconnect within sight of the equipment, and that requirement does not go away just because the mechanical room now has a door on it. Home theater equipment, exercise equipment with motors, and any permanently installed electric heating all justify separate circuits as well.
Routing matters as much as counting. Every home run travels from the panel to its first device, so a panel located at the far end of the basement means longer runs, more material, and more drilling through joists that may already be crowded with plumbing and duct. Group the home runs into an organized path along a main joist bay or a soffit line, and leave room for future cables rather than filling every drilled hole. If any portion of the route passes through an area that might later be finished differently, a conduit sleeve makes future additions possible without opening drywall. Label every cable at the panel end as you pull it, using tape and a marker, because unlabeled cables at trim out cost hours. Finish the job by filling out an accurate panel schedule, listing each breaker with the room and the loads it serves. That single sheet of paper is the most useful thing you can leave behind for the next electrician, and for yourself at eleven at night when something trips.
Permits and Inspections When You Wire a Finished Basement
Basement finishing work requires a building permit and an electrical permit almost everywhere in Ohio, and East Canton is no exception. The permit process is not a formality; it puts a trained inspector in the room at the point where mistakes are still cheap to fix. Most jurisdictions want a simple floor plan showing room use, egress, smoke alarm locations, and the electrical layout. Bedrooms carry extra requirements, including an emergency escape opening, and calling a room an office on the plan does not change what an appraiser or a buyer will see later. Permit fees for a residential basement are modest compared to the cost of the project as a whole. A licensed contractor handles the permit application as part of normal work, so the paperwork rarely lands on the homeowner at all.
Inspections come in stages, and timing them correctly keeps the project moving. The rough in inspection happens after all cable is pulled, boxes are set, and devices are connected inside boxes but before insulation and drywall go up. The inspector checks cable support and stapling, box fill, protection where cable passes through framing, grounding and bonding, box height and setback, and the presence of correct conductors for every circuit. Once that inspection passes, insulation and drywall can proceed with confidence. The final inspection covers devices, cover plates, fixtures, GFCI and AFCI operation, panel labeling, and smoke and carbon monoxide alarms. Both inspections are quick when the work was done correctly the first time. Want a professional set of eyes on your basement wiring before the drywall goes up? Click here for our electrical inspection service.
Skipping permits creates problems that surface at the worst possible moment. Unpermitted finished space regularly shows up during a real estate transaction, where a buyer’s inspector notes work that has no record and the lender or the buyer demands correction before closing. Correcting concealed wiring after the fact means opening drywall in a finished room, which turns a modest inspection fee into a several thousand dollar repair. Insurance carriers also take an interest in unpermitted electrical work following a fire or water damage claim, and a denied claim on a finished basement is a devastating outcome. Permits create a paper trail that documents the work was done to the adopted code at the time of installation. That documentation is worth far more than the fee and the wait.
Code Requirements That Apply When You Wire a Finished Basement
Basements sit under a specific set of code rules that differ from the rest of the house, largely because of moisture and because of the equipment that lives down there. The current National Electrical Code treats finished and unfinished basement areas alike for several protective requirements, which surprises homeowners who assume that drywall changes the classification. Grounding, bonding, cable protection, and device placement all carry rules that an inspector will check line by line at rough in. None of these requirements are difficult to meet when the work is planned around them from the start. They become expensive only when someone discovers them after the walls are closed. The sections below cover the requirements that come up most often on basement projects in this area.
GFCI and AFCI Rules When You Wire a Finished Basement
Ground fault circuit interrupter protection is required for basement receptacles, and the current code applies that requirement to finished and unfinished areas alike. This was a meaningful change from older code cycles, where finished basement living space was largely exempt. The reasoning is simple: basements sit below grade, concrete holds moisture, and a person standing on a slab has a far better connection to earth than someone on a second floor carpet. Ground fault protection reacts to current leaking outside the intended path and opens the circuit in a fraction of a second, well before the current level becomes dangerous to a person. Protection can be provided by a GFCI receptacle at the first device on the circuit, which then protects everything downstream, or by a GFCI breaker at the panel. Breaker level protection is often the cleaner approach in a basement because it protects the entire circuit including any junction points concealed in the ceiling.
Arc fault circuit interrupter protection applies separately and covers most of the rooms a finished basement will contain. The code lists family rooms, recreation rooms, bedrooms, dens, libraries, hallways, closets, laundry areas, and similar rooms, which describes essentially every space in a typical basement buildout. Arc fault devices detect the signature of an arcing fault, the kind of intermittent sparking that a damaged cable or a loose terminal produces long before a standard breaker would ever trip. Because most basement circuits need both types of protection, dual function breakers that combine GFCI and AFCI in a single device are the practical choice. They cost more per breaker than a standard device, and they are worth every dollar in a room where the wiring is permanently concealed. If a dual function breaker trips repeatedly after installation, that is information rather than a nuisance, and the cause is usually a shared neutral, a damaged cable, or a device with a loose connection.
Sump pumps deserve specific attention here. Older code allowed a single receptacle serving a sump pump to skip ground fault protection, and many homeowners still assume that exemption exists. Current code requires the protection, and the accepted approach is a GFCI device paired with monitoring so a tripped pump does not go unnoticed during a spring storm. Test every GFCI device in the basement monthly by pressing the test button and confirming the receptacle goes dead, then pressing reset. Devices manufactured in recent years include self testing circuitry, though the monthly manual test is still the reliable check. Any GFCI that will not reset, or that resets but does not trip on test, needs replacement rather than patience. Need GFCI protection installed correctly in your basement? Click here for our GFCI outlet installation service.
Receptacle and Lighting Placement in a Finished Basement
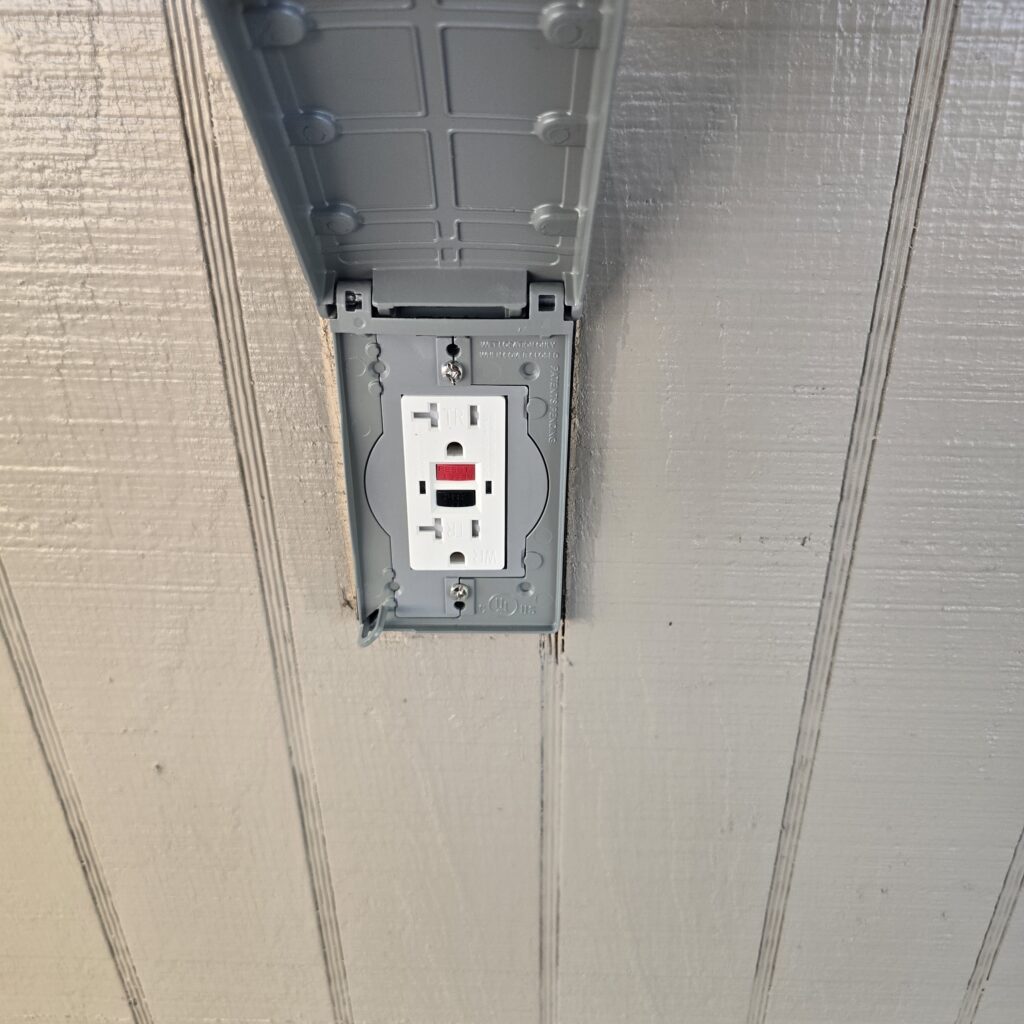
Receptacle spacing in habitable rooms follows a consistent rule: no point along the floor line of any wall should be more than six feet from a receptacle outlet. In practice that means a receptacle within six feet of every doorway opening and no more than twelve feet between receptacles along a wall. Any wall space two feet wide or wider counts, including short wall sections between a doorway and a corner, and fixed panels of sliding glass doors count as wall space as well. Freestanding bar counters and railings in an open basement layout have their own placement rules. All receptacles installed in dwelling unit living areas must be tamper resistant, which means they contain internal shutters that block foreign objects from entering the slots. Spacing generously beyond the minimum is almost always the right call in a basement, since a finished lower level accumulates lamps, electronics, and seasonal decorations faster than any other room in the house.
Lighting placement drives how the finished space feels, and basements have less to work with because ceilings are lower and natural light is limited. Code requires at least one wall switched lighting outlet in habitable rooms, in hallways, and at stairways, with switches at each floor level served by a stairway that has six or more risers. Beyond the minimum, layered lighting produces a far better result than a single row of fixtures down the center of the room. Recessed cans spaced roughly four to six feet apart handle general illumination without stealing headroom, and shallow canless LED fixtures fit in joist bays that will not accept a standard housing. Add switched receptacles or wall sconces for lamp level light, and put dimmers on the main lighting so the room can shift from bright to relaxed. Any recessed fixture installed in contact with insulation must be rated for that contact, and the rating is printed right on the housing.
Two more placement rules catch people regularly. Closet lighting has clearance requirements that keep fixtures away from stored material, with specific minimum distances from the storage space depending on the fixture type and how it is mounted. A surface mounted fixture with an enclosed lamp needs more clearance than a recessed fixture with a trim, and bare lamp fixtures are not permitted in clothes closets at all. Smoke alarms are required on every level of the home including the basement, they must be interconnected with the alarms on the other floors, and adding a bedroom to the basement adds an alarm inside that bedroom plus one immediately outside it. Carbon monoxide alarms are required near sleeping areas in homes with fuel burning appliances or an attached garage, which describes most homes with a furnace in the basement. Building these into the wiring plan at rough in costs almost nothing, while retrofitting interconnected alarms into finished ceilings is genuinely painful. Planning your basement lighting layout? Click here for our interior lighting installation service.
Cable Routing and Protection as You Wire a Finished Basement
Cable protection rules exist because drywall screws, trim nails, and shelf anchors all find their way into stud cavities long after the electrician leaves. When cable passes through a hole drilled in a stud, the edge of that hole must sit at least 1.25 inches back from the face of the framing member. Where framing depth makes that impossible, and it frequently does in a basement furred out with 2×2 or 2×3 material, a steel nail plate at least 1/16 inch thick covers the cable and takes the hit. Notching framing is a last resort and always requires a protective plate. In ceiling joists, holes belong near the center of the joist depth and away from the top and bottom edges where the structural stress lives. Nonmetallic sheathed cable needs support within 12 inches of a box with a cable clamp, or within 8 inches of a single gang plastic box without a clamp, and every 4.5 feet along the run after that. Staples should be snug enough to hold the cable and loose enough that they never crush the sheathing.
Moisture drives the second half of the routing question. Standard nonmetallic sheathed cable is not permitted in damp or wet locations, and a below grade masonry wall qualifies as a damp location in most inspectors’ judgment. That means cable should never be run in direct contact with foundation concrete or block, and a furred out wall against masonry needs either a cable type rated for the condition or a raceway. Many basement projects handle this by framing a conventional stud wall an inch or two off the masonry, which creates a dry cavity, provides room for insulation, and gives normal depth for boxes. Device boxes must be set so the front edge finishes flush with a noncombustible finished surface or within 1/4 inch of a combustible one, and box extenders solve the problem when a box ends up recessed too deep. Box fill limits are real and enforced, so count conductors, devices, clamps, and grounds before choosing a box size. Crowded boxes overheat and make future service work miserable.
Junction boxes must remain accessible after the room is finished, which means no splices buried above drywall or behind paneling. Every splice belongs in a box with a cover, and that cover has to stay reachable without removing building finish. Keep cable off the top of ductwork and away from hot flue pipes, and maintain separation between line voltage cable and low voltage runs for network, speaker, and thermostat wiring. Running the two categories in separate joist bays prevents interference and keeps future troubleshooting simple. Where cables cross a ceiling that will get a soffit or a drop, plan the drop before pulling wire so nothing has to be rerouted at trim out. Leave enough conductor length at each box, generally at least six inches of free conductor with a minimum of three inches extending outside the box, because short wires make device replacement a chore for the next twenty years.
Why You Need a Licensed Electrician to Wire Your Finished Basement
Basement wiring is concealed work, and concealed work is exactly the kind that punishes shortcuts on a long delay. A mistake in a lamp cord shows up immediately, while an overfilled box or an unsupported cable behind drywall can sit quietly for a decade before it causes a problem. Licensed electricians work under the adopted code every day, carry insurance, pull permits as a matter of routine, and stand behind what they install. They also bring an experienced read on the practical questions that codes do not answer, including where the panel should go, how many circuits the room really needs, and how to route cable around the ductwork that is already in the way. Gragg Electrical Services has wired finished basements throughout East Canton, Canton, North Canton, Louisville, Hartville, and the surrounding communities for more than twenty years.
Safety Risks of Trying to Wire a Finished Basement Yourself
The most common failures in do it yourself basement wiring are quiet ones. Loose terminal connections generate heat under load, and heat degrades insulation until a fault develops in a wall that nobody can see. Overfilled boxes trap that heat instead of dissipating it, and improperly stapled cable can be pinched hard enough to damage the sheathing without anyone noticing. None of these conditions announce themselves; they simply age. A trained electrician torques terminals to specification, sizes boxes for their actual contents, and supports cable in a way that lasts.
Grounding and bonding errors are the second major category, and they are the ones that put people at risk directly. A subpanel with its neutral bonded to the enclosure sends return current across metal parts that should never carry it, including ductwork and water piping. A missing or improperly terminated equipment grounding conductor means a fault has no low impedance path back to the source, so the breaker may never trip when it needs to. Basements make grounding errors more dangerous because concrete floors provide a solid path to earth through a person’s feet. These are not subtle mistakes to an inspector, and they are almost invisible to a homeowner working from an online video.
There is also the simple matter of working around an energized panel. Adding circuits means opening a live enclosure where the incoming service conductors are not protected by any breaker, and those conductors remain energized even with the main switched off. Arc flash inside a residential panel causes serious burns, and it happens fast enough that reflexes do not help. Licensed electricians follow established safe work practices, use the right tools, and know exactly which parts of a panel remain hot. That knowledge is a substantial part of what a homeowner is actually paying for.
Resale Value and Insurance When You Wire a Finished Basement
Finished basement space contributes to a home’s value, and permitted work with an inspection record contributes considerably more than undocumented work. Appraisers and buyer’s inspectors both look for evidence that below grade finishing was done properly, and a clean permit history answers that question before it becomes a negotiation point. Homes in Stark County change hands regularly, and basement finishing shows up in disclosure conversations more often than almost any other improvement. Documentation costs nothing at closing. Missing documentation costs real money.
Insurance is the other consideration, and it becomes relevant at the exact moment a homeowner is least prepared to deal with it. Carriers investigate the cause of fire and water losses, and unpermitted electrical work in the area where a loss originated invites scrutiny that no homeowner wants. A denied or reduced claim on a finished basement can run well into six figures once contents, structure, and displacement are counted. Properly permitted work installed by a licensed contractor takes that entire argument off the table. It is one of the cheapest forms of protection available on a remodeling project.
There is a practical benefit too, which is that professionally wired basements are easier to live with. Labeled panels, well distributed circuits, correctly placed receptacles, and layered lighting all make daily use of the room better. Adding a television, a treadmill, or a small refrigerator later does not require running an extension cord across the floor. The work simply does what it was designed to do, quietly, for as long as the house stands.
Why Choose Gragg Electrical Services to Wire Your Finished Basement
Gragg Electrical Services has spent more than twenty years wiring homes across East Canton and the surrounding communities, and basement finishing is work we handle regularly. We run the load calculation, plan the circuit layout around how you actually intend to use the room, pull the permit, and coordinate our schedule with your framer, insulator, and drywall crew so the project never sits waiting on us. Our crews show up on time, protect the surfaces they work around, and clean up before they leave. Every installation is backed by our Lifetime Craftsmanship Guarantee. That guarantee reflects how we approach concealed work in the first place.
We also understand that a basement project is a significant investment, so we offer financing through GreenSky and Turns to spread the cost across a manageable schedule. Our estimates are detailed and written before work begins, with no surprise line items after the fact. If something comes up mid project, and occasionally something does in an older home, we explain the options and the cost before proceeding. You get a straight answer and a clear price.
Electrical problems do not schedule themselves conveniently, which is why we keep crews available 24/7 for emergency service throughout East Canton, Canton, North Canton, Louisville, Hartville, Massillon, Green, Uniontown, and the surrounding areas. Call us at (330) 488-8009 or email info@graggelectrical.com to schedule an estimate for your basement project. We are happy to walk the space with you, review your plan, and tell you exactly what your existing service can support. Getting the electrical right is the difference between a basement you enjoy and one you keep fixing.